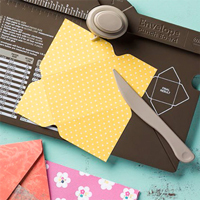
With the launch of Sale-a-bration and the new Spring/Summer catalogue I just had to post twice today! I’ve come back to share a tutorial with you, I love my envelope punch board and I am still amazed by how many different uses it actually has! This is going to be a photo heavy post so please bear with me…
The technique for making the bows is the same whatever the size so I will share sizes (in inches and cm) at the end.
To create the bow you need three pieces of paper or card, two that are the same width but different lengths and a small skinny strip.
Start with the longest strip, position it into the punch board so that the left hand end is at half the length. In this case the strip was 15 cm so I have it at 7.5 cm. Punch the strip in the centre on both edges as shown in the picture.
Next we need to shape the ends, start by sliding the paper along to the left so that the end lines up with the edge of the punch as shown in the first picture. Then do the other side as shown you will
do this on each ‘corner’
This is what your piece should now look like
Now you need to shape the shorter piece, this will create the ‘tails’. The first step is exactly the same, punch in the middle so that you end up with a piece that looks like this
Now rotate this piece a quarter turn, centre it into the punch and punch. Do this on both ends to create the fish tail ends.
You will now have three pieces that look like this
Take the longest piece and curl it as shown
Stick the ends down into the centre
Wrap the skinny piece around the centre and adhere the ‘tail’ into place, you can either
have a straight tail like this
or you can create a pleat in the tail and have them pointing down like this
You can make bows in all sorts of different sizes, and even double bows too!
Finally here are the dimensions, from top to bottom and then the double bow. I hope you have lots of fun playing, please comment and let me know if you create any different sizes!
Tiny Bow
1 piece 15cm x 2.5cm / 6” x 1”
1 piece 9cm x 2.5cm / 3 1/2 ” x 1”
1 piece 0.5cm x 2.5cm / 1/4” x 1”
Small Bow
1 piece 20cm x 2.75cm / 8” x 1 1/8”
1 piece 12.5cm x 2.75cm / 5” x 1 1/8”
1 piece 0.7cm x 2.75cm/ 1/4 x 1 1/8”
Medium Bow
1 piece 25cm x 3cm / 10” x 1 1/4”
1 piece 15cm x 3cm / 6” x 1 1/4
1 piece 0.8cm x 3cm / 5/16” x 1 1/4”
Large Bow
1 piece 30.5cm x 4cm / 12” x 1 1/2”
1 piece 17cm x 4cm / 6 1/2” x 1 1/2”
1 piece 1cm x 4cm / 3/8” x 1 1/2”
Small Double Bow
Bottom Bow - 1 piece 20cm x 2.75cm0 / 8” x 1 1/8”
Top bow - 1 piece 16cm x 2.75cm / 6 1/4” x 1 1/8”
Tails – 1 piece 12.5cm x 2.75cm / 5” x 1 1/8”
Table built using Stampin' Up! Product Table Builder from The Crafty Owl.

![IMG_0911[2] IMG_0911[2]](https://blogger.googleusercontent.com/img/b/R29vZ2xl/AVvXsEhxQNjGsEt0Mzw31LJYKBlYTJccEO58z6828sjiYp-h0DKd_5SAosFhWch5kgWOKTtSvJzh0x-2-o1U1yH9m0Xo1qZXnvMWTqPMCSsMCCyQbYglJQX0GR23OfdYnOajiLNRPTxPoZGSC9o/?imgmax=800)
![IMG_0912[1] IMG_0912[1]](https://blogger.googleusercontent.com/img/b/R29vZ2xl/AVvXsEjD9e5sXTZBP9jA-ehvi8CcsCAlrv7EIcmODbVjO3eGWqRPrglXJZTmFPP6qIkuMFQNhcANYp79wvdzfKjaTZchoajuyYLPI-Ff6V0GsnSeRH4_ROBswvjWKLcXS9NXEtZi2pqu0slW5Mw/?imgmax=800)
![IMG_0913[1] IMG_0913[1]](https://blogger.googleusercontent.com/img/b/R29vZ2xl/AVvXsEjD3xPsl4XciEbBwJCkCqRERdMafsYPmOI3m69dULyTBJT4HiE6AygF_eDzw8ynCm28f-suCX5lQC4TwVfZvVpc8N4fxAQdvolaMEp-2dMzMiL8-ORrGIP3uliYzFUnJBzKPRmy8PVKO5Q/?imgmax=800)
![IMG_0915[1] IMG_0915[1]](https://blogger.googleusercontent.com/img/b/R29vZ2xl/AVvXsEhNq_K_qQ-fDUQlxoZ1qK2ZiyyrFjSdTJIC8k6ltQ-F3c2x8ZCz8dNa6lWxo-1JJwHfrUzpC5IeSXvVyjY-SsyPIKphEpsAISR4xrjErtc1o_aHE8W8RpchqnJDDXJkNYzy2oIWUzlrPuc/?imgmax=800)
![IMG_0916[1] IMG_0916[1]](https://blogger.googleusercontent.com/img/b/R29vZ2xl/AVvXsEhuEZNl_m-AEYiWLRrDpOd5hTv8QlaizPghOGmk6UbTcIHBePDL0EvzESA7sc8hNpe-WqWQ14asL-8bCHsnO0gRea4JChbp1Gl585u8N6FLClkRzuyvpAbz3pSR8mnU2wMUFRk778cPjOQ/?imgmax=800)
![IMG_0917[1] IMG_0917[1]](https://blogger.googleusercontent.com/img/b/R29vZ2xl/AVvXsEhpOk6PwBqQNxXqXmjGcwfi5zCVXj6smTtWwg7ctzrEnJTwVAgldLd2P08LjyY7e4FHgwz67ocrQddlVcTi1qTQ4gGBfP1P44qje9iTPUAtFhyphenhyphenAQCOd90yokNTXtNPno2A12LGppiqV0Wc/?imgmax=800)
![IMG_0919[1] IMG_0919[1]](https://blogger.googleusercontent.com/img/b/R29vZ2xl/AVvXsEhYi_GHZcfCZ6xBedG8Ay3NVtnHOFIINQvBQuFVcrlsy4mOXBSU1uMJ59JEXKkwFEnOFwfvkQ4H72x6HilQ8tAL4-KobVJd-i-t_apyNEuTZMEWE83s_OO7SN6R_RaSbKRTiwvXvgCRpi8/?imgmax=800)
![IMG_0920[1] IMG_0920[1]](https://blogger.googleusercontent.com/img/b/R29vZ2xl/AVvXsEggy3pXOMJtjwbQEqYsqpbrvZFTp1Z8pQBzK76FM5Yw4Z8lLiJ9njCfCn7ukR11CaA8hJPFM2CGOt0MIDSnjs0YtiqxX0e3pR5BjHIWBVNrBWKARYnG2T2CkyvtLivel7Qluhx0ltpAnKk/?imgmax=800)
![IMG_0921[1] IMG_0921[1]](https://blogger.googleusercontent.com/img/b/R29vZ2xl/AVvXsEgoa4Yh0V7HAcVitX9bMx4bCpITDSF9qMe5jLj3SfuVqdHScLFWdyFKoPzRDNCsmMMK4Br6jB_M3uZCSRyEsdrcgzdeCRKxaSrd5UAPht54_ExqHzDbGlwBPPo3ouzfAX8viMbsX4QzQK0/?imgmax=800)
![IMG_0922[1] IMG_0922[1]](https://blogger.googleusercontent.com/img/b/R29vZ2xl/AVvXsEgxIkhyOECB5gW3FgL-qkhRkiEuA638IG3lo7VfXuPgN1SJLGbRJ5E05Cghwv3M7pOibJXYQUJ1r_PpL_0Os7rLSeXI07axNLhyphenhyphenTsXAhboDbCWbN3-bzsWVZ8nv1aDGYC8haKluIMgrBE8/?imgmax=800)
![IMG_0924[1] IMG_0924[1]](https://blogger.googleusercontent.com/img/b/R29vZ2xl/AVvXsEhGhfDaibpdp5saI0gBIVnKdlgbPLkehE0TEIz3F8jP92Z5F1HqG2_5FIn3gDMqxQnmEmP8bAYsNyOXOdCcFvVYWXAi_fgSPiKVja_M9ElNpukzsUpxFWSE2sW-f11TwEwUcHYbUbXncX0/?imgmax=800)
![IMG_0925[2] IMG_0925[2]](https://blogger.googleusercontent.com/img/b/R29vZ2xl/AVvXsEg-swIPp-hgwPgDZPRdqKPc4fM9r9usCVn45JmixCr_mtJ2JQDE-IianjAAJ8X-fiEA6DwOz1TvyFh64twSDm9NbS-qpH_SzITtuUNoDL3JRVh2lUEY_sd_VZOwDz1ptNQmv4qfLf2hZNw/?imgmax=800)
![IMG_0926[1] IMG_0926[1]](https://blogger.googleusercontent.com/img/b/R29vZ2xl/AVvXsEg-PXT2LiR8fJECmw5KAls4x5GHCYgWDplo2EcBSyxK_yyCPLVME-OXUWXmAifq5fWPIPVXzULVJDJg7o8D5hZbEiV9JdTqw4Uu71ZyJ0gt5-VcMsQHgSo1-ac6w4ILV-0mwXHM2i8O05U/?imgmax=800)
![IMG_0927[1] IMG_0927[1]](https://blogger.googleusercontent.com/img/b/R29vZ2xl/AVvXsEhez3m64n99nYfqDmxHQWej-MSUDODkXDPDxe4FhwLEmuOhLnI6aDNR9AS6Sd42yJdOEXst3E6J8fWY9WdBKhJ8Pe4o1lBiqXa_f_jOsTj0BpUd3On-sG9gdtqSgqbRoDbEY_FR-jvZuJI/?imgmax=800)
![IMG_0934[1] IMG_0934[1]](https://blogger.googleusercontent.com/img/b/R29vZ2xl/AVvXsEhy10HuhJUavYA8cTPsu-V0LocprEY_73zhVgwW37E-QMRV3hGhQQg3NnnDZyHNiKDA-B-wK1dvt1GtMLfONpRUqr2V3m_U0F42m_jLcLUMDZe8cQwqOMrtxEFpOgzJ7H1Vo33CFHZ-hyg/?imgmax=800)


No comments:
Post a Comment