Tuesday 19 April 2011

Doesn't time fly?


I really don't know where this week has gone! It seems like only yesterday I was posting last.  I've not had much time for crafting as it's the school holidays.  Hubby is home too (he's a teacher) so we've had some nice days out.  By the time we get home sort dinners, baths and bedtime I'm wiped out!  To be honest I'm kinda feeling that way now :)  We've had a lovely day in the sunshine at Barnwell Country Park, I'd highly recommend it - Thomas and Daisy both enjoyed the play area too!

Right, onto the crafting that I have been doing.  Last night my weekly craft club ladies met.  I'd decided that I wanted to do a bit of heat embossing but am not actually sure that this card shows it at it's best.  Will have to spend some time googling for more inspiration for another week.  


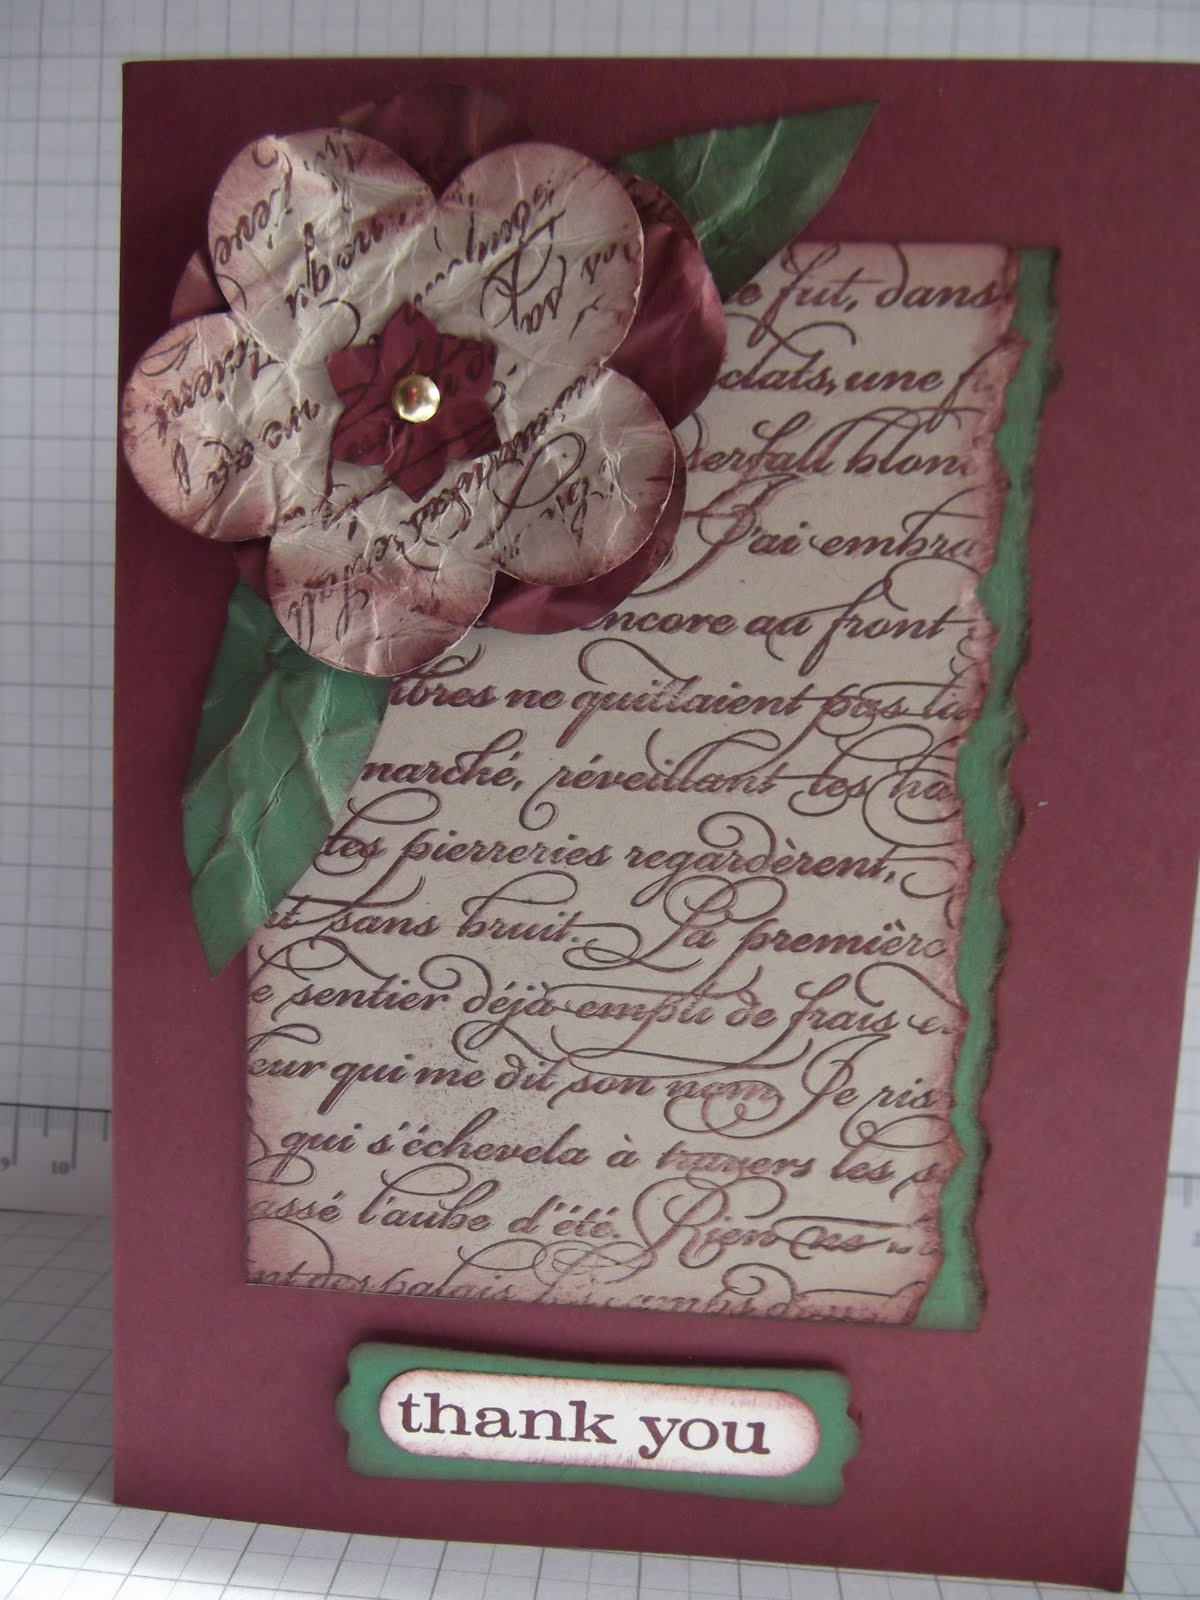
This card is based on a sketch I made while browsing around the net a few weeks ago, I forgot to make a note of who to credit so if you think it's you let me know and I'll happily link to your blog. The flowers have been clear embossed and then cut out and mounted onto dimensionals for some added texture.  I also had a bit of a 'blooper' moment when I decided midway through that one of the stamps was mounted wonky and needed re-mounting.  Only I well and truly bodged it so I very quickly came up with another option for the inside of the cards, in the end it came out really well - oops I didn't get pictures :)


That's all for now, I'm going to try and get some posts scheduled as we are away visiting family over hte Easter weekend but I have loads to show you from some recent Stampin' Up! events I've attended.  If I don't manage it have a fantastic Easter!

Wednesday 13 April 2011

Club cards week 2


We made two cards this week.  I wanted to show how you can use the inkpads for water colouring so kept the cards simple.  These pictures show the first of the two cards.  I used circle punches to create the window and frame.  I kept the water colouring on this card quite flat to show the difference you can achieve, the second card is much more shaded.  The stamp set is A Flower for All Seasons.


The second card, I did two layouts just by switching the orientation.  Excuse the shadows, I didn't notice them when I took the pictures!


Heere's a close up of the image, I've built up the colour and shaded the outline.  I am by no means an artist but I find this technique really forgiving especially if you use watercolour paper.  I've added a mat for the image using the same size punch and cutting it in half then layering on the back.  I also tore the DSP strip to add a little bit more interest.


If you live in or near Northampton and would like to come along to classes get in touch by clicking on the contact me tab at the top of the page.

Tuesday 12 April 2011

Distressed Flowers


This type of crafting is really growing on me, I'm not normally one to enjoy getting all that messy and I like the clean and simple look but there is something about distressing that I really like. That just sounds wrong :) Anyhow I said I'd share with you the projects that caused my inky fingers on wednesday night and here they are


The background stamp is En Francais this is lovely big stamp and the script is beautiful.  The sentiments are from Just Believe.  The ribbon is the gorgeous whisper white organza ribbon which I've coloured using a soft suede marker, I have ruffled it over a bit of sticky strip.  Colours are Riding Hood Red, Very Vanilla, Chocolate Chip and Soft Suede on card one and Bravo Burgandy, Garden Green and Crumb Cake on card two. 


The flower is made using the fancy flower and boho blossoms punch, with freehand cut leaves.  These have been scrunched and crumpled then inked to give that distressed look.  I hope you like today's offering, I think I will have to play with this for my craft club as it was so much fun!

Thursday 7 April 2011

Inky fingers.....

... more on that in a bit! 

I'm having so much fun playing with my BigShot at the moment.  The dies are turning out to be loads more versatile than I first thought!  I wanted to share with this little project with you


It' a little handbag made using two of the Scallop Envelope die cuts.  How cute?!?  I decided that I wanted to make a card to go with it to give to my gorgeous friend Debbie as she celebrated her birthday on Tuesday - she kept it quiet though so I'm really glad of my facebook reminder :)


The card is done using the new set Baby Blossoms.  I stamped a random background using Reagal Rose, Rose Red Always Artichoke and Crumb Cake. (above)  By using the 'stamping off' technique you get a few different shades of the same colour which I really like.  I got this stamp set in clear mount and you don't even need to use the stamp-a-majig, this is saying a lot as I'm quite a perfectionist when it comes to my crafting.  I am beginning to step out of that comfort zone though :)  I also used the beautiful new seam binding ribbon, it ruffles so well! Here's a close up


You can see from the close up that I've also used my Rose Red and Crumb Cake markers with the colour spritzer tool, I'm liking this finish!  Here's the finished card, just to prove that I can do distressing I tore the edges!  The sentiment is from Perfect Punches.


And now to explain the title of this post.  I spent a really lovely couple of hours last night with some crafty friends but I did get in a bit of a mess - more out of my comfort zone distressing!  Here's proof!


Only thing is, I can't get it off! I've tried baby wipes, staz on cleaner, washing up liquid but it's not budging - all tips gratefully recieved. Oh it's just the normal SU ink.  Will post pics of the projects soon - happy crafting xx

Wednesday 6 April 2011

First club Session....


 Well most of Monday I was a jittering wreck - not help by an exploding nappy right before I had to collect Thomas from school! Thanks for helping me with that Mel!  The pictures above are the two samples I had made, I decided after making the yellow one that I needed something else so ended up with the blue version - what do you think?

Unfortunately a couple couldn't come - hope you are better soon!  So it was just two and me.  It's was all needless nerves though because the session went really well, it was lovely to meet you ladies and I hope you both enjoyed it as much as I did.  Sometimes my non crafty friends think I'm a bit strange getting excited over new ribbon, paper, or even adhesive - come on we all love the SNAIL :) it was so lovely to share my passion with people who are as enthusiastic as me.

 These are the finished projects. I love the contrast between the green and the yellow, really vibrant and fresh!  


 Supplys 
Stamps - Just Believe
Cardstock & Ink - Daffodil Delight, Bashful Blue, Marina Mist, Certainly Celery, Pear Pizazz, Whisper White
Designer Series Paper - Subtles Paper Stack, Greenhouse Gala
Tools - BigShot, Top Note Die, Perfect Polka Dots Embossing Folder
Punches - Word Window, Scallop Oval, Boho Blossoms, Scallop Trim Border
Accessories - Basic Pearls, 5/8" Organza Ribbon, Stampin Dimensionals

That's all for now - off swimming with Daisy in a bit.  Enjoy your wednesday.

Sunday 3 April 2011

Mother's Day ...

 Happy Mother's day to all you wonderful Mummies out there!  Today I want to share the cards that I made for my Mum and also my Mother in Law.  Firstly I used the new Build A Blossom stamp set and the co-ordinating punch - LOVE IT!!!!  I've used poppy parade ink and stamped off first with the solid image then over stamped with the detail image with a 'full inking' - I think perhaps I'll post a little picture tutorial of how to do this soon as I'm not sure I'm explaining myself that well :)  There is quite a lot of white space on this card and for me that's a new thing - what do you think?  The second card is for my Mum, she has a thing for red tulips and this set inspired me to have a play - I think I've captured the tulip reasonably well :)

I've used the same colour combination of Poppy Parade, Old Olive and Whisper White but this time I've stamped the detail in classic ink onto the coloured cardstock.  I used my bone folder to add the vein detail to the leaves and the 1/4" grosgrain ribbon to look like stems.  Mum is stamped using the gorgeous set Broadsheet Alphabet, it's a beautiful set and so versatile.


Happy Mother's Day!

Saturday 2 April 2011

Mini Catalogue Blog Hop

Well it could be a blog marathon really as there are 56 of us from In Love With Stamping taking part today.  The hop has been split into 4 groups, I am in group 3 and the others groups can be found by clicking on the links here Group 1   Group 2   Group 4

If you get stuck in any loop use the group 1 link above, Erika has a full list on her sidebar.

You should have come here from Rita's blog - Rita's work is beautiful and she has inspired me in the past when I've been lacking in mojo!

Ok so here are my offerings, first I have a full picture of something that you got a sneaky peek of a while back.  It's a gift box made using the Top Note die, I am in love with my BigShot!  I think it's great that 17 out of the 23 dies in the mini catalogue are EXCLUSIVE to Stampin' Up!  The BigShot is great for those times when you need to quickly duplicate things and it's so easy to use - keep an eye on my blog for more details about exclusive BigShot classes that I will be running.  Get in touch if you'd like to come to one they will run from my home in Northampton.

Here's the box, I've used some of my retired papers because I know that my friend loves these colours.  Dies used are the Top Note and the 4 pack of dies Lots of Tags.  I have also used the embosslit Sweet Buttons, the word window punch and the distressing essentials kit.


 Project number 2 is a gift bag topper, again using the Top Note die as I wanted to show the versatility of it.  I don't think I've begun to scratch the surface yet though!


Here's a close up of the topper.  I've used Old Olive, Pear Pizazz and Very Vanilla Cardstock.  The punches are Decorative Label, Blossom Petal (both new in the mini) 1 -3/4" x 7/8" oval and the 2 step bird.  The sentiment is from Oval All and is stamped in Early Espresso then stuck over the Pear Pizazz frame (from the new Four Frames set in the mini).  I made the little bloom using the smallest petal from the blossom punch, stamped 3 times in Blushing Bride then once in Pear Pizazz.  I stuck the 3 pink petals together, then cut the green one in half and stuck that on too, the stem is from the 2 step bird.


My 3rd project is actually a swap that I am making, I have used Stampin Pastels to colour another of the images from the Four frames set.  This set fits the designer label punch perfectly!   I really like the way that you can 'double mount' it too, here I've  used Rose Red, it's slightly lighter than the rich Razzleberry Top Note so it pops!  I've stamped the foliage from Vintage Vogue in versamark all over the Top Note to give a watermarked effect.  Inside is a yummy chocolate biccy!


I really hope you like my projects please leave a comment as I really like to know what you think.  Next in the hop is Carolyn, check out her blog here

Nervous and excited....

I've nearly finished prepping for Monday's craft club!  Mostly I am excited but a little nervous too!  I don't want to spoil it yet by posting pics, so keep an eye out early next week.  Oh and for those of you that are coming there will be cupcakes to celebrate the first session!

Next on my list of things to start getting prepped is very exciting!  My lovely downline Georgie works in a retirement village in Northampton and has organised use of their hall for us!  We are hoping to hold crafting events fortnightly so keep an eye out for more details soon! :)

Friday 1 April 2011

Mini Catalogue Launches today!

How exciting I can share with you all the really exciting new products that launch in the mini catalogue!  Most excitingly for me is the BigShot! I have been playing with mine for nearly a month now and have loads of pics to show you.  Just for fun here's one of Thomas using it :)


I will be back later with some more project pics but in the meantime put your feet up with a cuppa and have a browse through the catalogue here.


There will be a link in my sidebar later too, get in touch if you want to place an order or if you live within and hour or so of Northampton and would like a crafty get together with friends - I'll bring the BigShot too!